本文将介绍如何单一使用gitee博客,后面会考虑介绍多线部署多个博客。
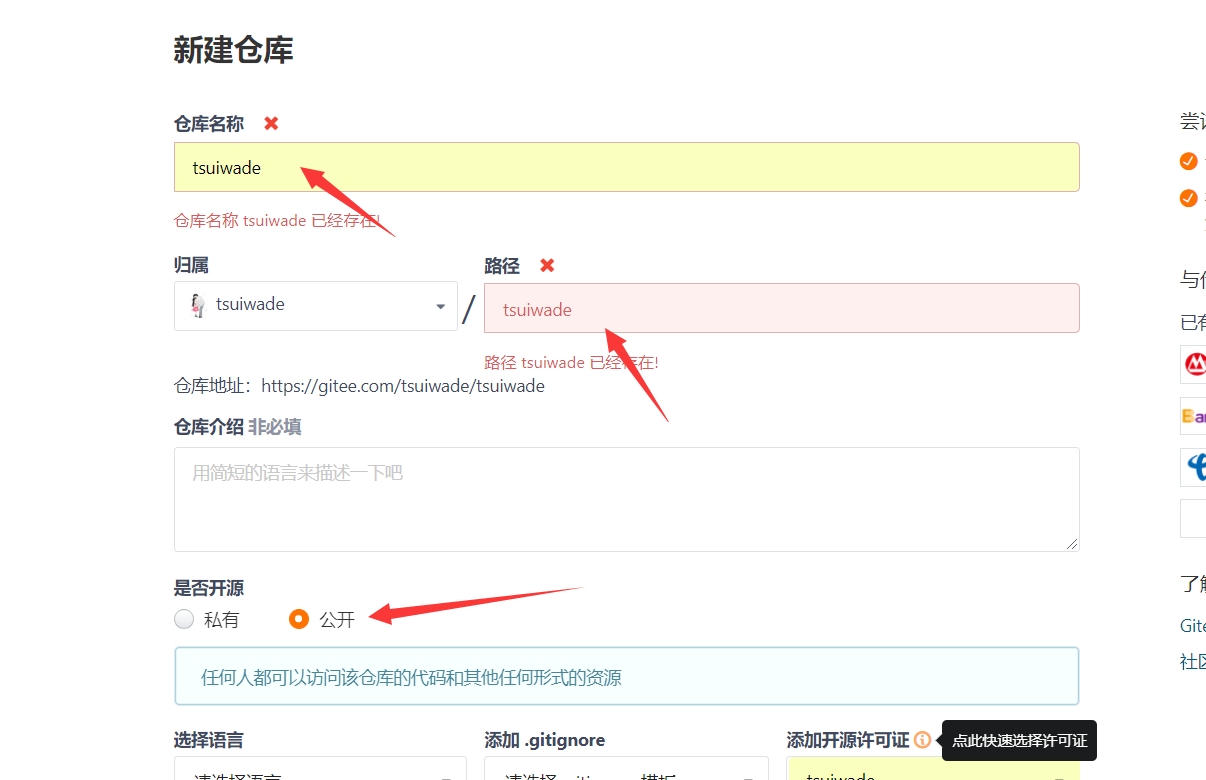
新建gitee仓库
尽量仓库名称与用户名保持一致。
请复制生成token、因为只会生成一次,请及时粘贴保存。如果忘记了、记得重新生成。
hexo配置文件修改
复制URL,到hexo的配置文件_config.yml
url: https://tsuiwade.gitee.io/
|
deploy:
  type: git
  repo: https://gitee.com/tsuiwade/tsuiwade
  branch: master
|
gitee部署
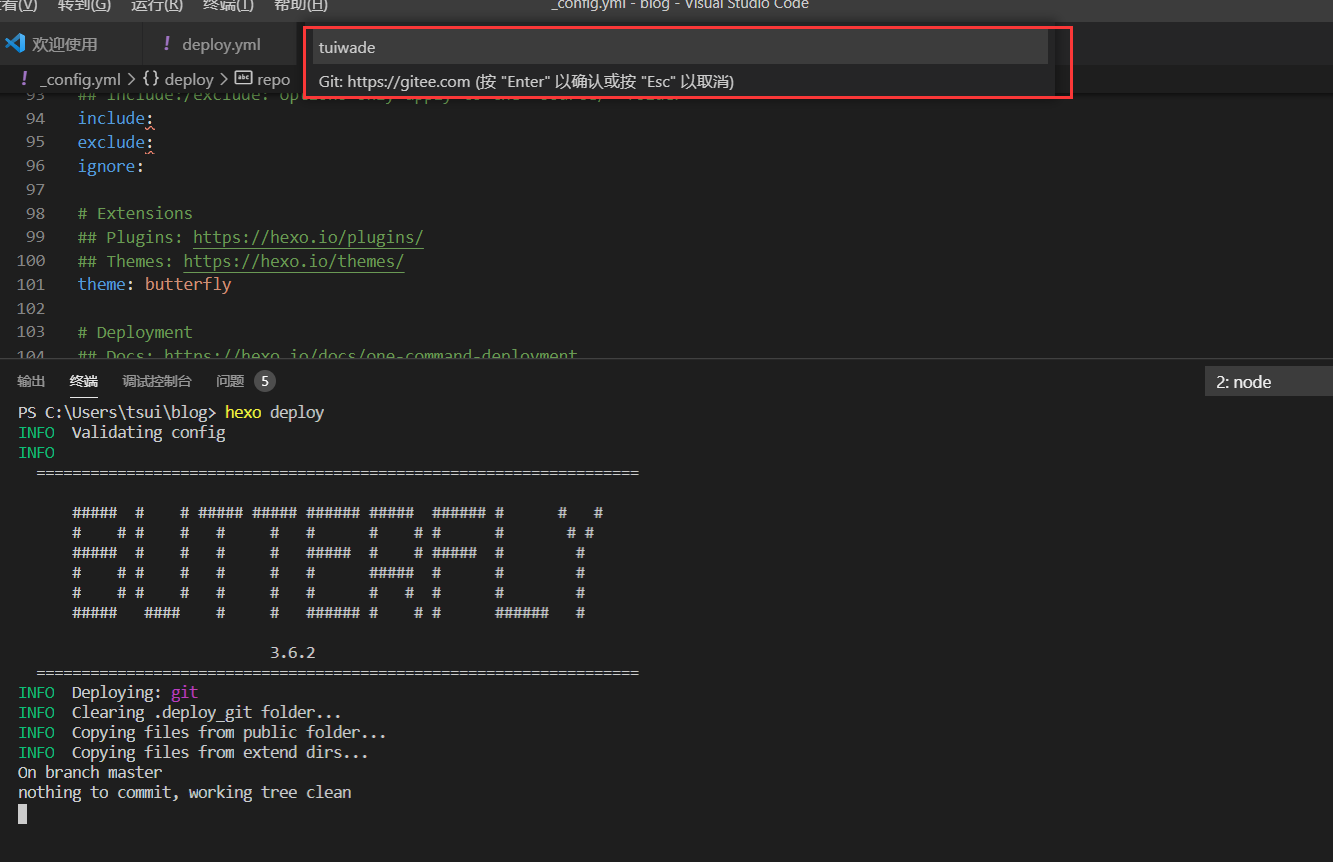
接下来在根目录输入hexo d进行部署,然后如图,输入自己的信息。
gitee设置
部署完可以回到gitee仓库上看看:
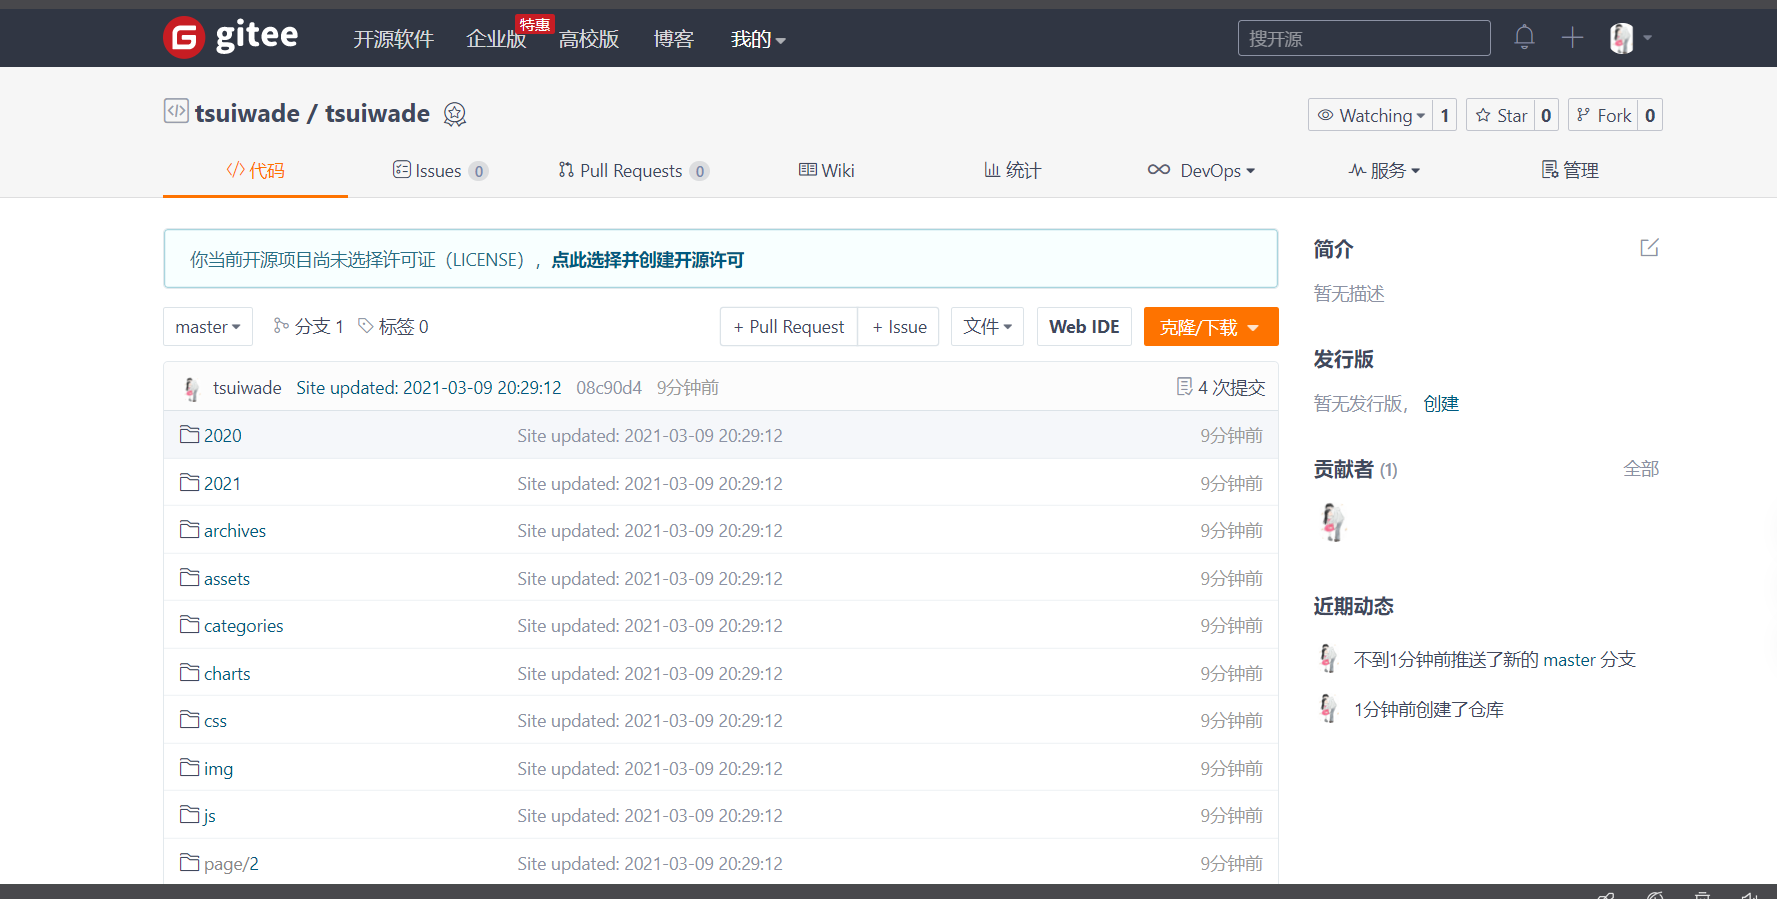
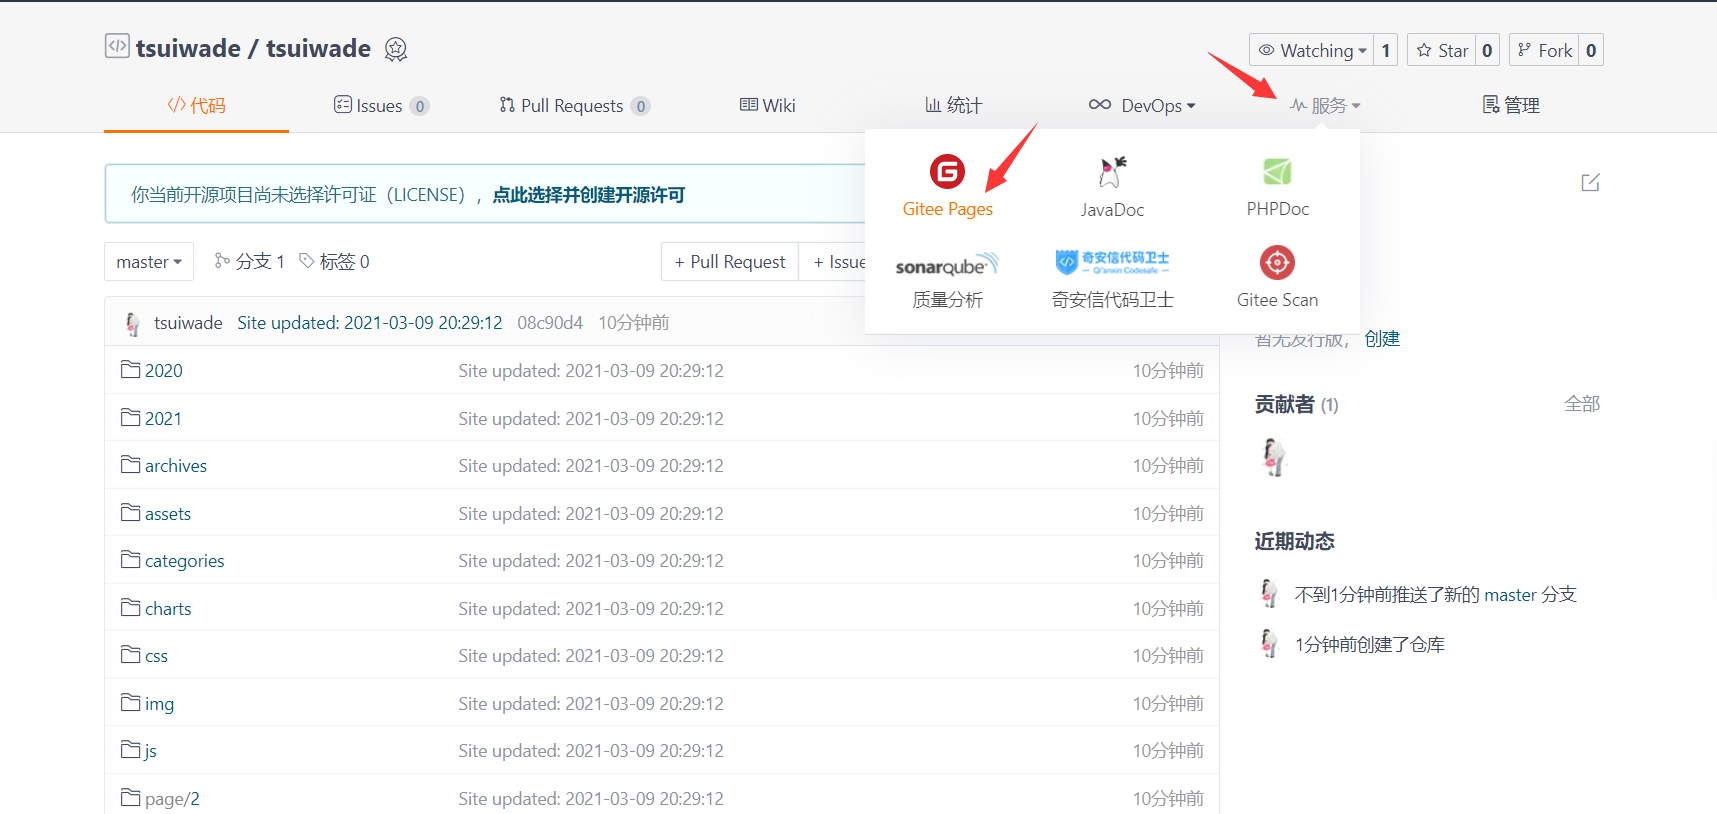
此时gitee仓库上已经有了内容,再点击服务——pages:
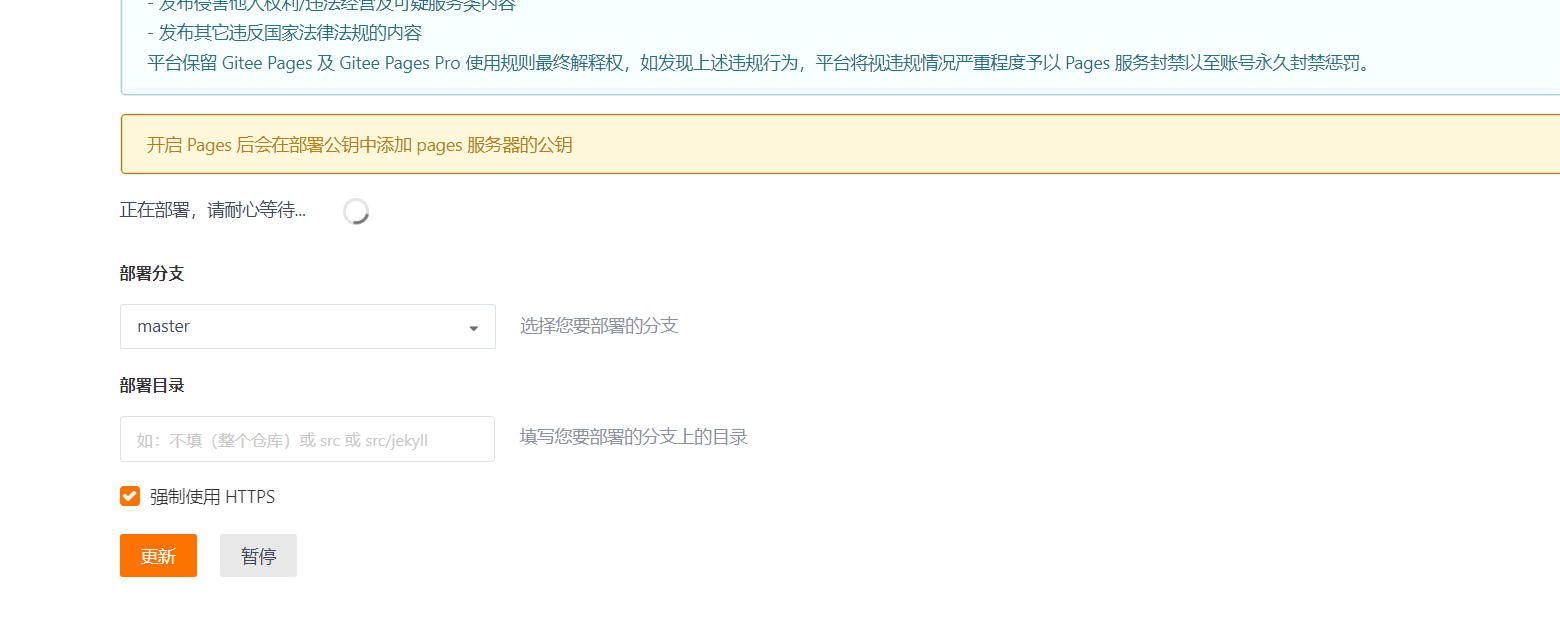
在master分支下,点击更新,等待部署完即可访问自己的网址。https://tsuiwade.gitee.io
如何更新部署
gitee并不像github可以自动化部署,因为 Gitee 的自动部署属于 Gitee Pages Pro 的服务,不可通过git add . && git commit .. && git push三连提交代码。。
而是必须hexo cl && hexo g && hexo d来提交代码。
请注意,必须先hexo cl 。
此时网站已经搭建好了,访问速度也快许多。
当然,我们不会满足于此。
是否有一种方法,只需我同样适用git三连进行提交代码,而可以同时部署到github.io和gitee.io上。
创建github私有仓库
我们需要一个私有仓库用来存放 Hexo 的源文件、用来执行 Action
比如我这里创建的仓库名为aacitons,并且设置为私有。
生成 Github Token
为确保 hexo d 有足够的访问权限、我们需要创建 token
因为我需要同时部署到 Github 和 Gitee 上、就需要生成三个 token (你可以选择你需要的来创建)
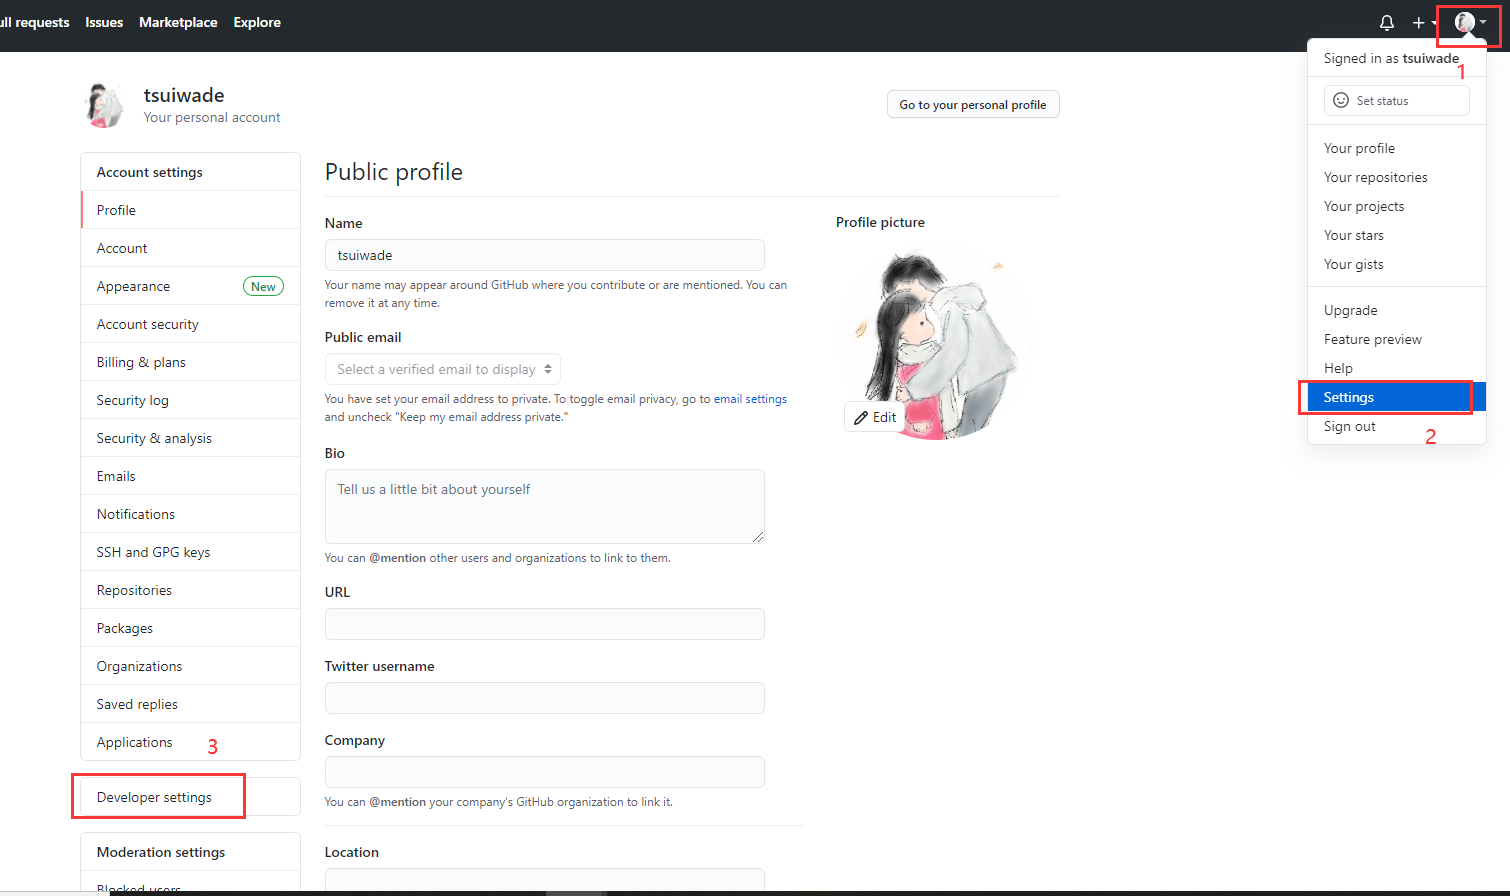
进入 Github 、点击头像 -> Settings。找到 Developer settings。
点击 Personal access tokens,点击 Generate new token
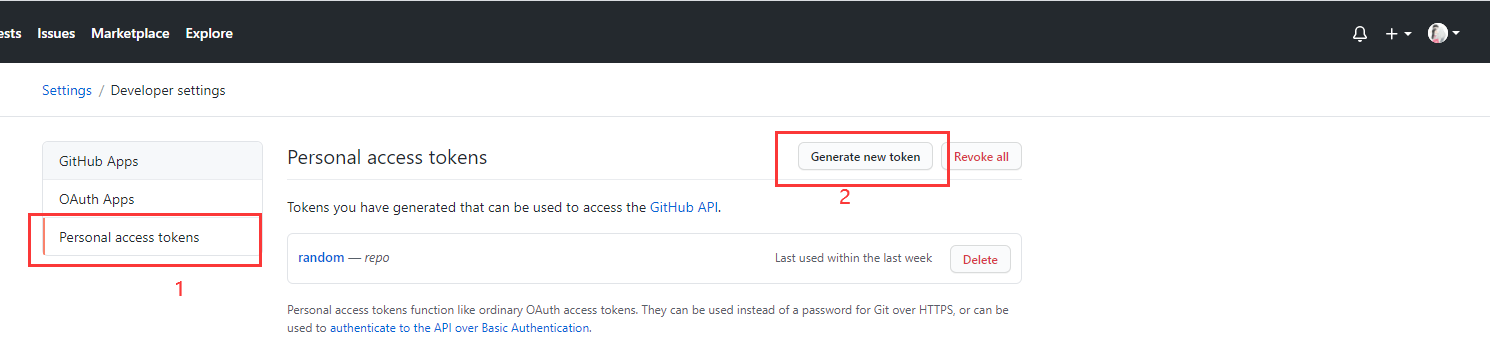
名字随便取、一定要勾选 repo
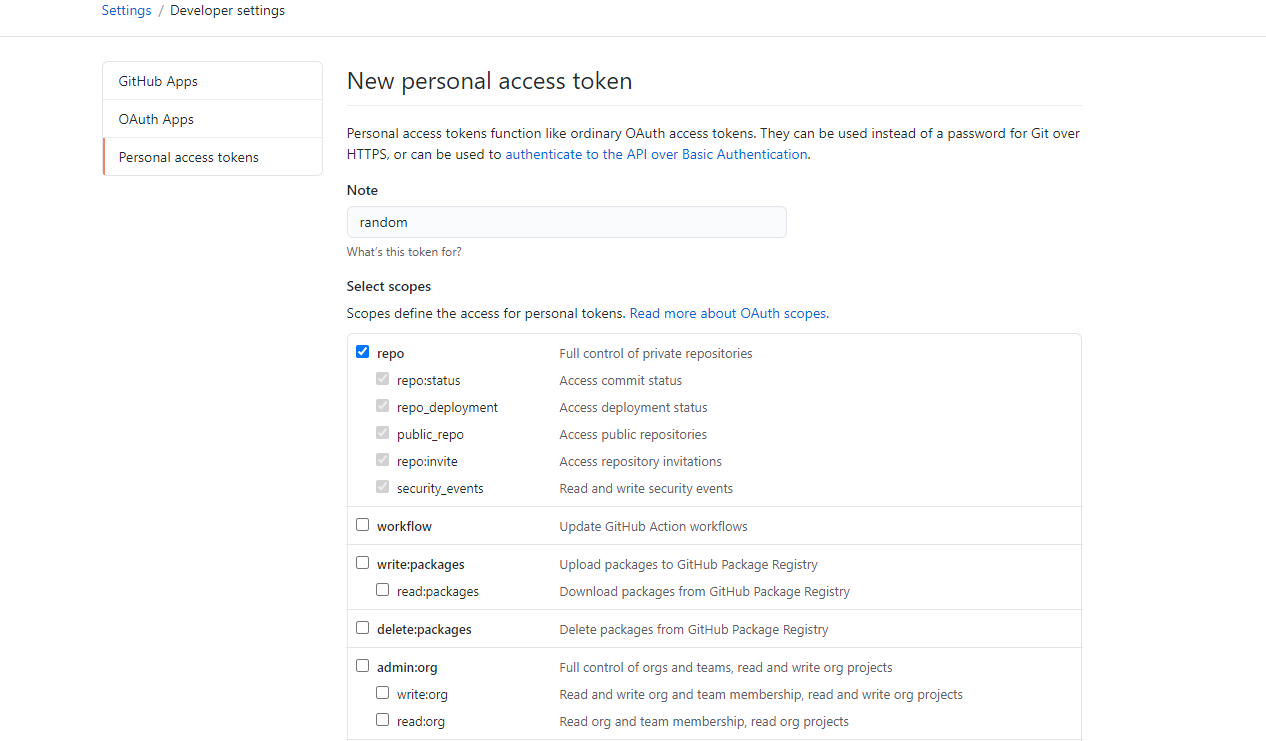
请复制生成token、因为只会生成一次,请及时粘贴保存。如果忘记了、记得重新生成。
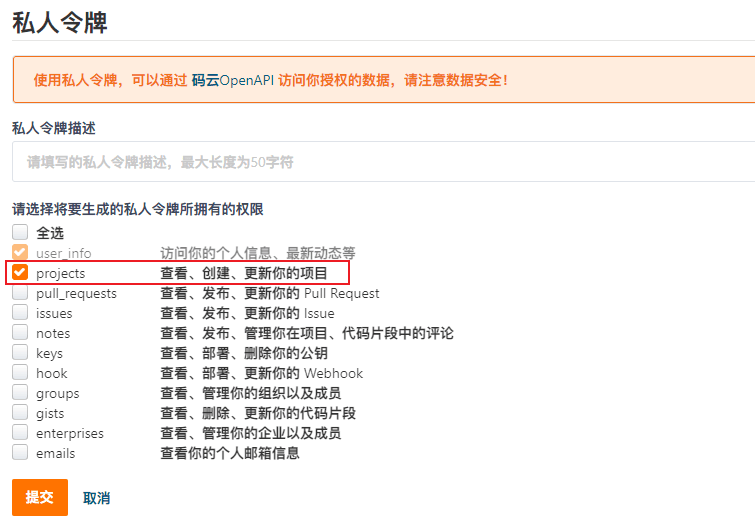
生成 Gitee Token
进入 Gitee 、 点击头像 -> 设置
点击安全设置 -> 私人令牌
编辑 _config.yml
编辑根目录下的 _config.yml
deploy:
  type: git
  repo:
    gitee: https://tsuiwade:稍短的那个token@gitee.com/tsuiwade/tsuiwade.git
    github: https://tsuiwade:稍长的那个token@github.com/tsuiwade/tsuiwade.github.io.git
  branch: master
|
配置 Github Action
里面写 Github Actions 的配置内容:
当然下面的部分内容需要根据自己配置如:
name: 自动部署
on:
jobs:
deploy:
runs-on: ubuntu-latest
steps:
- name: 检查分支
uses: actions/checkout@v2
with:
ref: main
- name: 安装 Node
uses: actions/setup-node@v1
with:
node-version: "12.x"
- name: 安装 Hexo
run: |
export TZ='Asia/Shanghai'
npm install hexo-cli -g
- name: 缓存依赖
uses: actions/cache@v1
id: cache
with:
path: node_modules
key: ${{runner.OS}}-${{hashFiles('**/package-lock.json')}}
- name: 安装依赖
if: steps.cache.outputs.cache-hit != 'true'
run: |
npm install --save
- name: 生成静态文件
run: |
hexo clean
hexo generate
- name: 部署
run: |
git config --global user.name "tsuiwade"
git config --global user.email "478451541@qq.com"
git clone https://github.com/tsuiwade/tsuiwade.github.io.git .deploy_git
hexo deploy
- name: 同步到 Gitee
uses: wearerequired/git-mirror-action@master
env:
SSH_PRIVATE_KEY: ${{ secrets.GITEE_RSA_PRIVATE_KEY }}
with:
source-repo: "git@github.com:tsuiwade/tsuiwade.github.io.git"
destination-repo: "git@gitee.com:tsuiwade/tsuiwade.git"
- name: 构建 Gitee Pages
uses: yanglbme/gitee-pages-action@master
with:
gitee-username: tsuiwade
gitee-password: ${{ secrets.GITEE_PASSWORD }}
gitee-repo: tsuiwade/tsuiwade
|
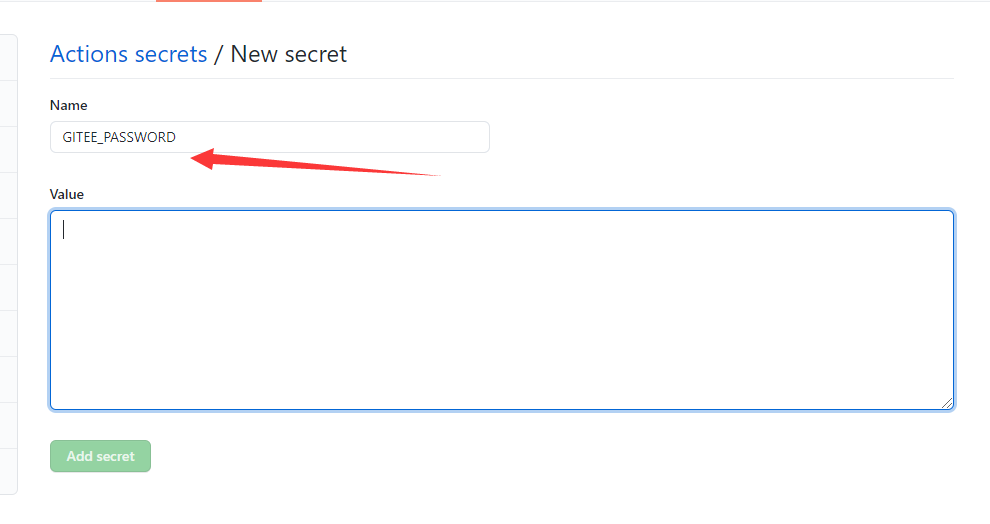
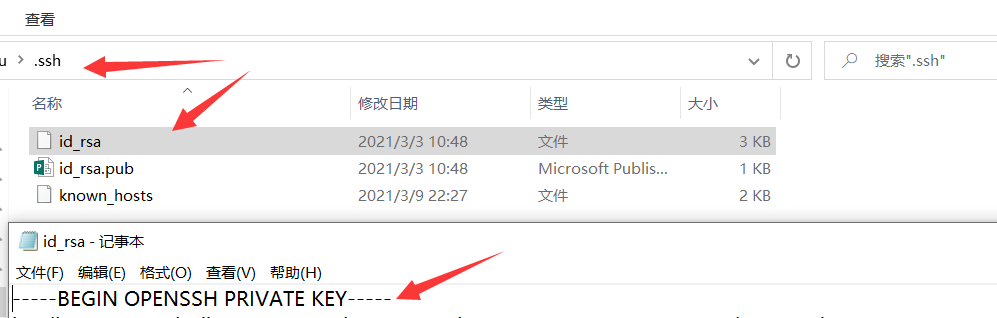
私有仓库的秘钥设置
在私有仓库内配置
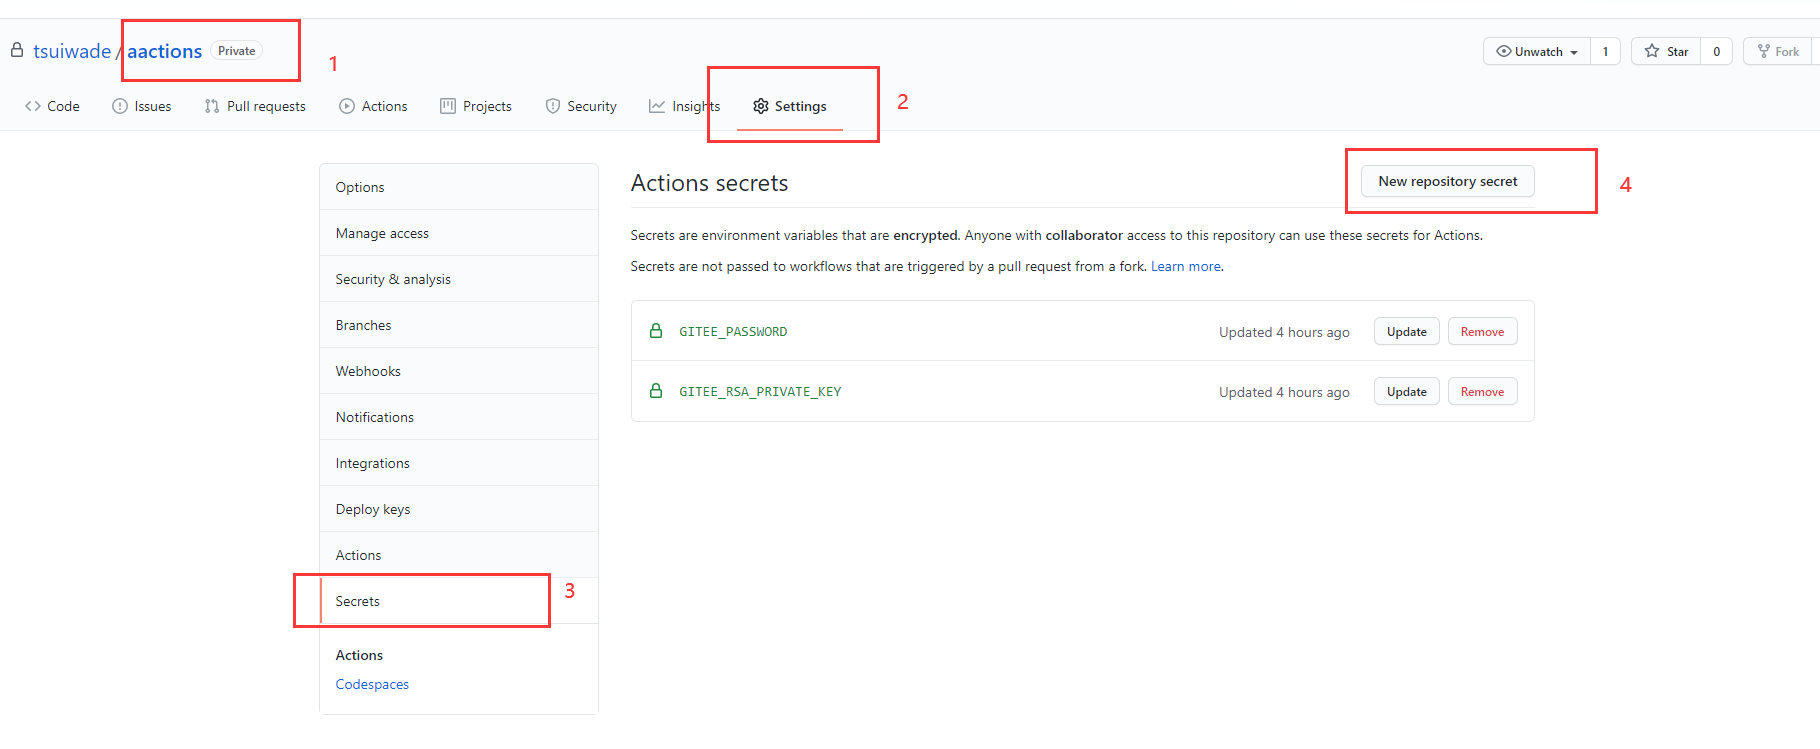
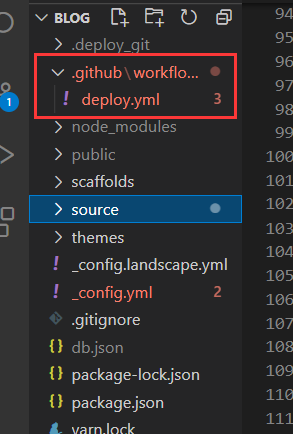
需要新建仓库的2个秘钥,键分别是GITEE_PASSWORD和GITEE_RSA_PRIVATE_KEY,而值分别是gitee账号的密码和.ssh/id_rsa文件内的内容(文件格式如图)。
提交代码
在博客根目录 [Blogroot] 下启动终端,使用 git 指令重设仓库地址。这样在新建仓库,我们仍旧可以保留珍贵的 commit history,便于版本回滚。
git remote rm origin
git remote add origin git@github.com:[GithubUsername]/[SourceRepo].git
git checkout -b master
git add .
git commit -m "github action update"
git push origin master
|

倘若在此出了错,提交的分支名和仓库名。
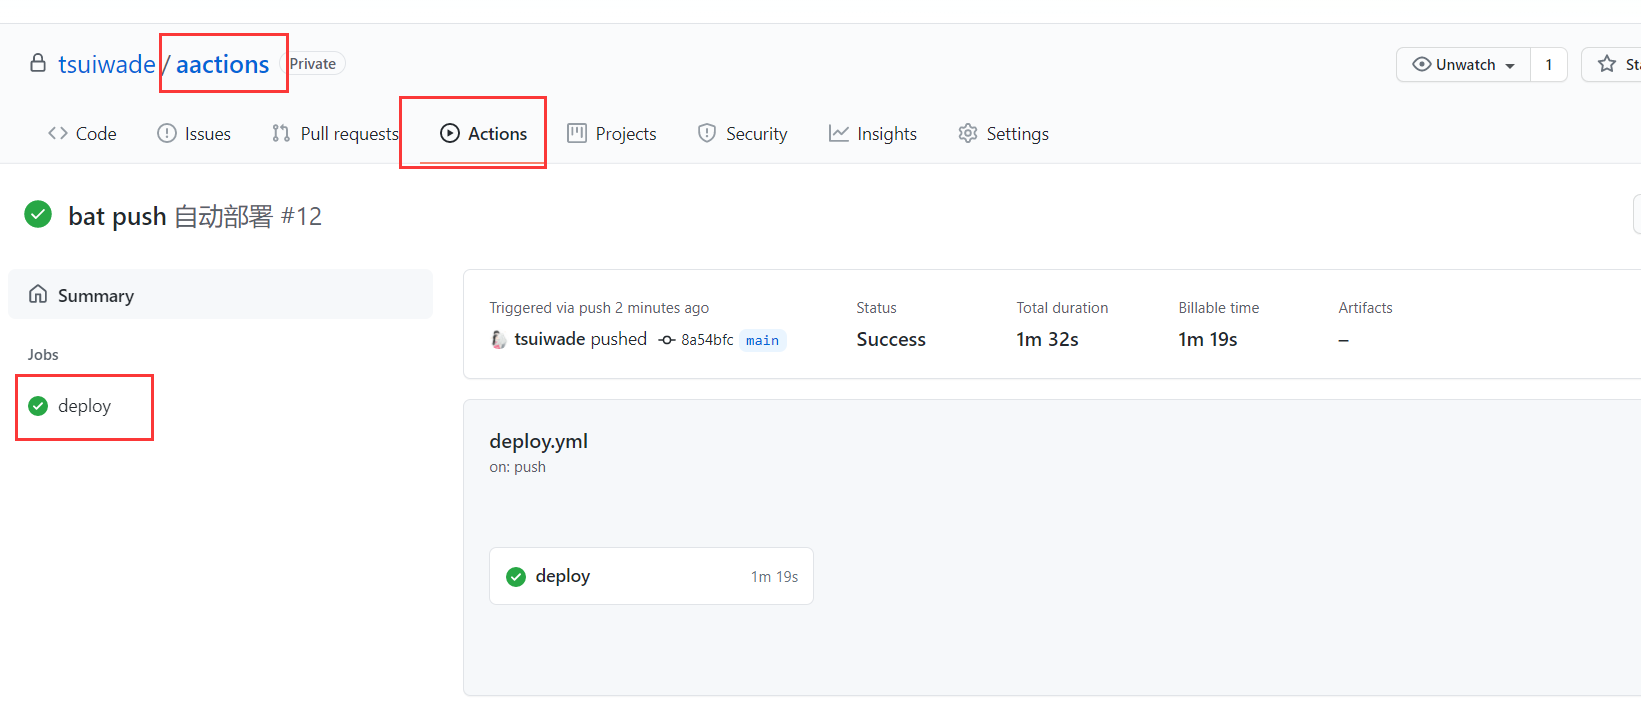
最终可以在github新建私有仓库内看到actions成功。
主要参考:https://blog.zykjofficial.top/posts/ea8e8e59/