【第13篇博客】github贡献日历上画画及博客首页显示gitcalendar
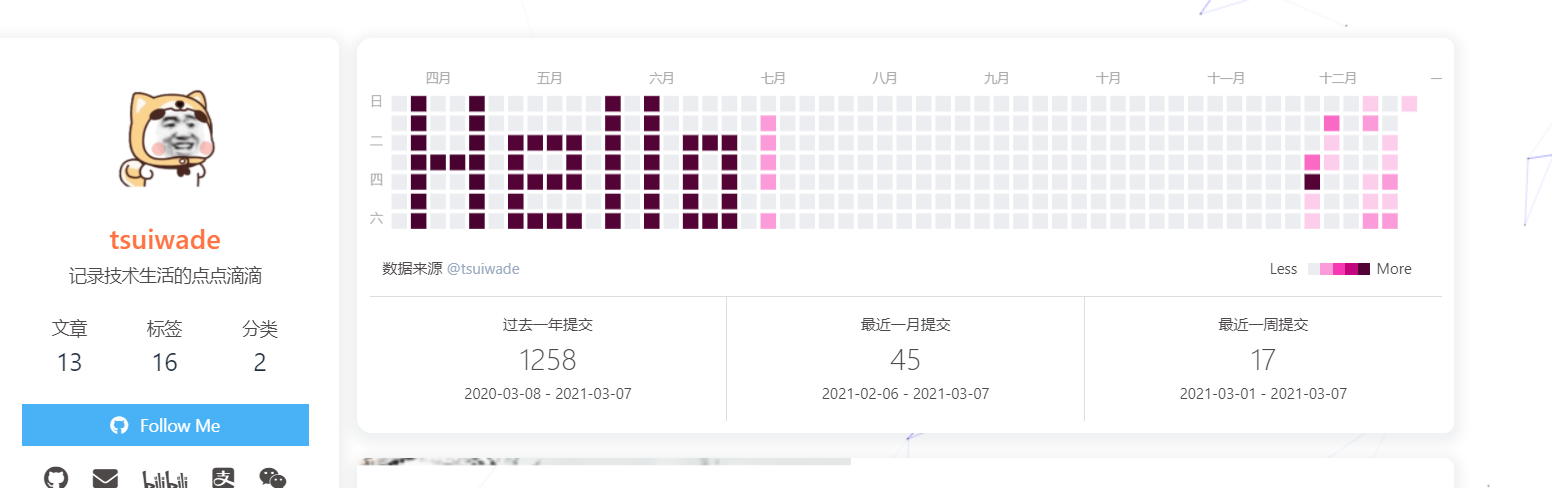
gitcalendar魔改效果
由于我是新人,号是新号,github贡献日历基本都挤在右边,看上去确实囊中羞涩、乏善可陈,于是想为加上一些图案,正好看到前人有过类似魔改记录,于是重新走了一遍,首先先来看一下效果。
github首页效果:
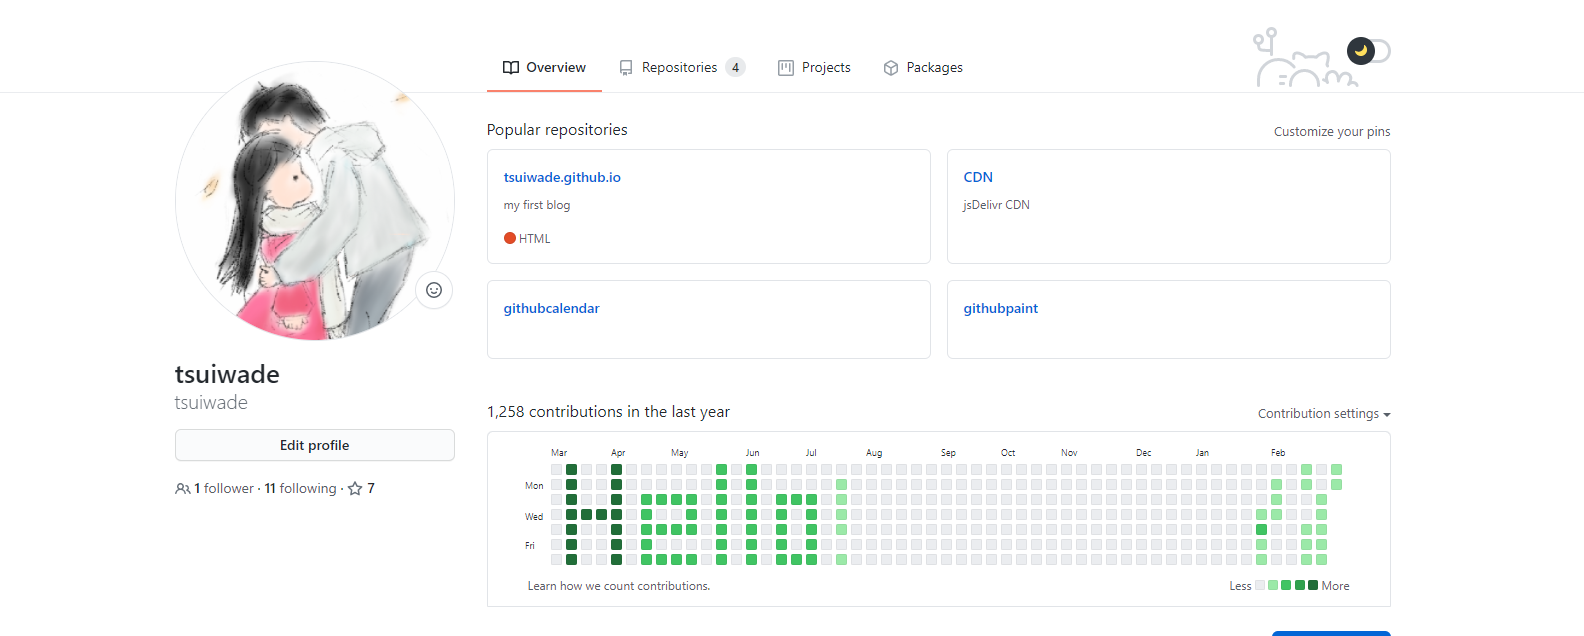
博客首页效果:
github图案绘制
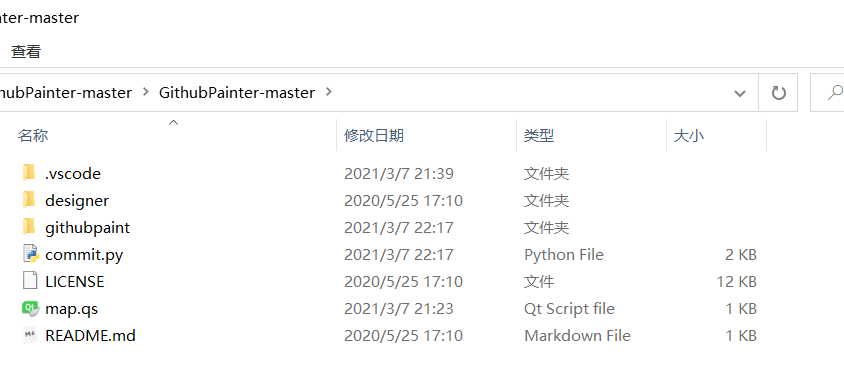
首先感谢qinshuang1998大神的开源项目GithubPainter ,在本地新建一个空文件夹,例如我在桌面上打开
git bash here。下载该项目,得到如下图文件。git clone https://github.com/qinshuang1998/GithubPainter.git
打开文件
./designer/index.html,这一个用html写的designer设计器,打开后会生成一个和Github一模一样的贡献板,你可以通过在上面点击鼠标来控制格子的颜色,进行绘制图案,如我选择的图案。注意,应先选择结束日期,在自己的github首页上看看最后一天对应哪天,再选择开始日期,也需要在github贡献日历上看看左上角是哪天,对应起来。
接着进行绘制图案,如我选择的图案,点击一下是最浅色,多点击则变深,请各位耐心绘制自己喜欢的图案。
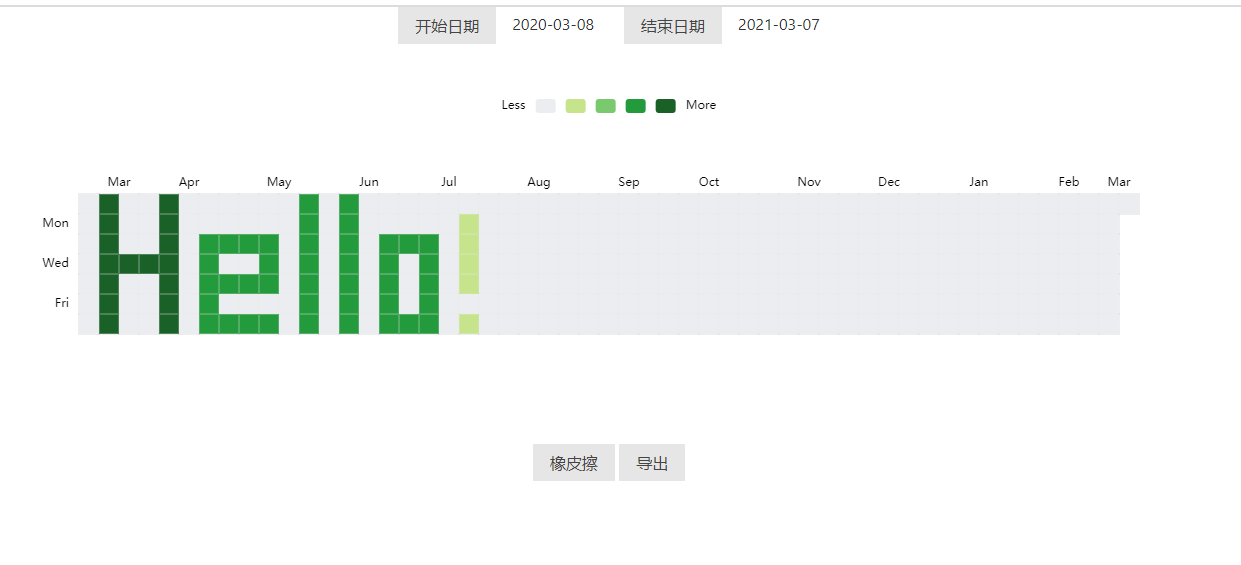
图案绘制完毕,导出为map.qs文件,替换上图路径下的同名文件。
github仓库创建
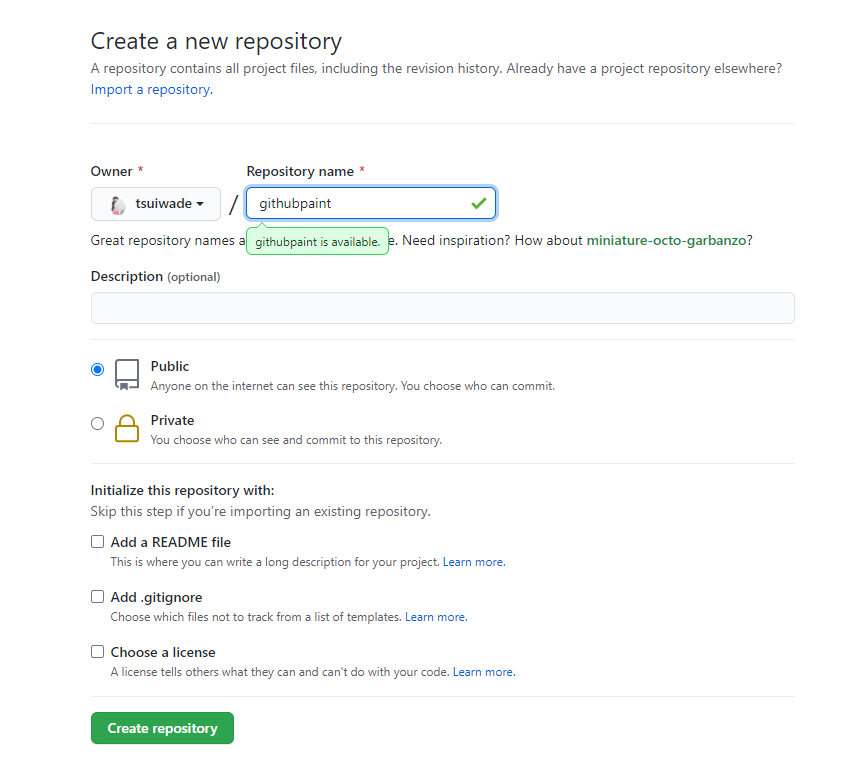
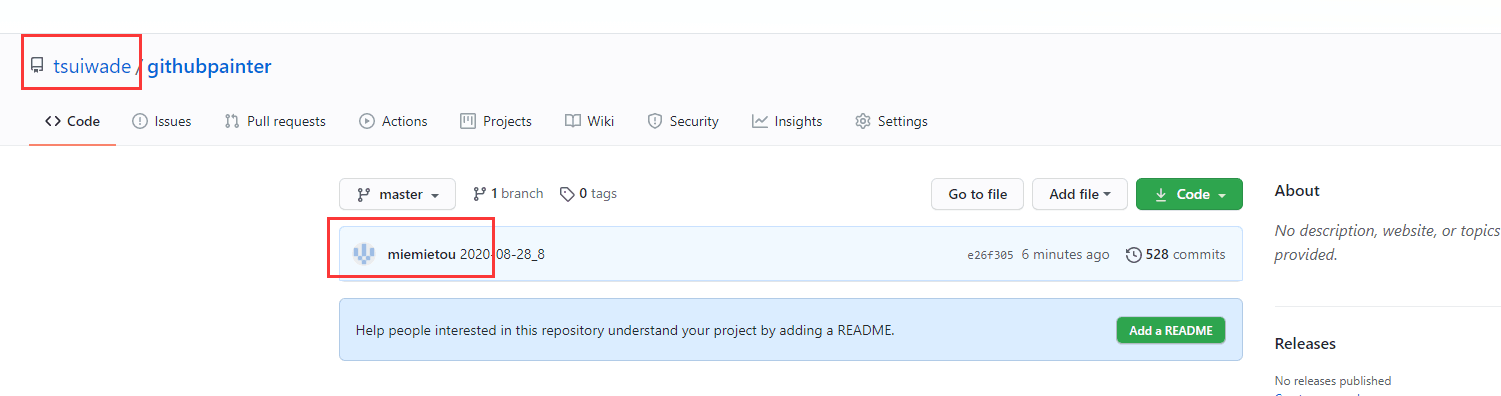
在github上创建新仓库,我命名为githubpaint。
然后在刚刚C:\Users\tsui\Desktop\GithubPainter-master\GithubPainter-master路径下打开git bash,将自己的githubpaint项目clone下来:
git clone git@github.com:tsuiwade/githubpaint.git |

因此在C:\Users\tsui\Desktop\GithubPainter-master\GithubPainter-master路径下生成了githubpaint文件夹。
commit脚本
接着执行python文件,用commit.py的python脚本读取它,并对本地的Git仓库进行commit操作就好了(脚本中的文件路径等参数需要自己改动,包括本地仓库文件githubpaint和图案文件)。
repo = Repo('./githubpaint') |
注意,这里的git模块是GitPython模块,通过pip install gitpython或conda install gitpython进行安装。GitPython块python用来封装git操作的模块,主要用来替代gitbash的操作。
不报错运行完即是成功运行。
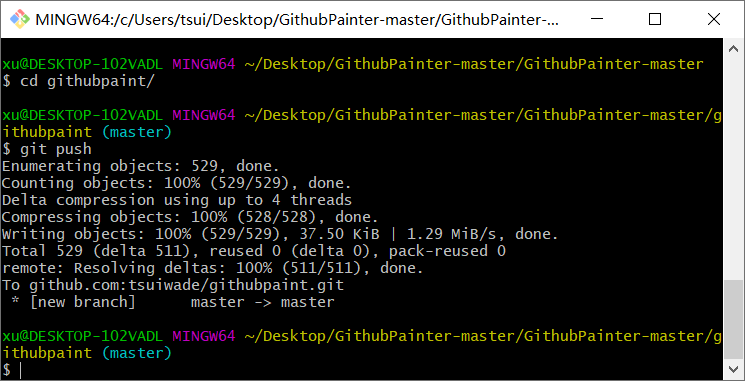
git push提交
运行完成后将你的本地仓库push即可,在本地仓库githubpaint路径下git push,就可大功告成了。此时查看你的github首页,就不那么囊中羞涩、乏善可陈,反而有趣新奇,甚好甚好。
hexo-github-calendar使用
hexo api 文档可参考https://zfe.space/post/hexo-githubcalendar.html 。
一键部署:
npm i hexo-githubcalendar --save |
网站根目录_config配置项(不是主题的): 例如butterfly配置为
# Ice Kano Plus_in |
接下来来简单说明一下配置项的含义:
enable
参数:true/false
含义:是否开启插件enable_page
参数:/
含义:路由地址,如 / 代表主页。/me/代表自我介绍页等等user
参数:zfour
含义:你的 github 或者 gitee 用户名
layout
参数:type; (class&id)
参数:name;
参数:index;(数字)
含义:如果说 gihubcalendar 是一幅画,那么这个 layout 就是指定了哪面墙来挂画
而在 HTML 的是世界里有两种墙分别 type 为 id 和 class。
其中在定义 class 的时候会出现多个 class 的情况,这时就需要使用 index,确定是哪一个。
最后墙的名字即是 name;<div name="我是墙" id="recent-posts">
<!-- id=>type recent-posts=>name -->
<div name="我是画框">
<div name="我是纸">
<!--这里通过js挂载githubcalendar,也就是画画-->
</div>
</div>
</div>githubcalendar_html
参数:html 模板字段
含义:包含 loading,和挂载容器HTML
<div class="recent-post-item" style="width:100%;height:auto;padding:10px;">
<!--这个是画框,顾名思义就是借用文章样式给加个框-->
<!--这个是loading的样式,可自行调整-->
<div
id="github_loading"
style="width:10%;height:100%;margin:0 auto;display: block"
>
<svg
xmlns="http://www.w3.org/2000/svg"
xmlns:xlink="http://www.w3.org/1999/xlink"
viewBox="0 0 50 50"
style="enable-background:new 0 0 50 50"
xml:space="preserve"
>
<path
fill="#d0d0d0"
d="M25.251,6.461c-10.318,0-18.683,8.365-18.683,18.683h4.068c0-8.071,6.543-14.615,14.615-14.615V6.461z"
transform="rotate(275.098 25 25)"
>
<animateTransform
attributeType="xml"
attributeName="transform"
type="rotate"
from="0 25 25"
to="360 25 25"
dur="0.6s"
repeatCount="indefinite"
></animateTransform>
</path>
</svg>
</div>
<!--这个是github_containner容器,也就是纸-->
<div id="github_container"></div>
</div>
最后执行:
hexo clean & hexo g & hexo s |
就可以看到效果了!
统计页的效果
效果如下:
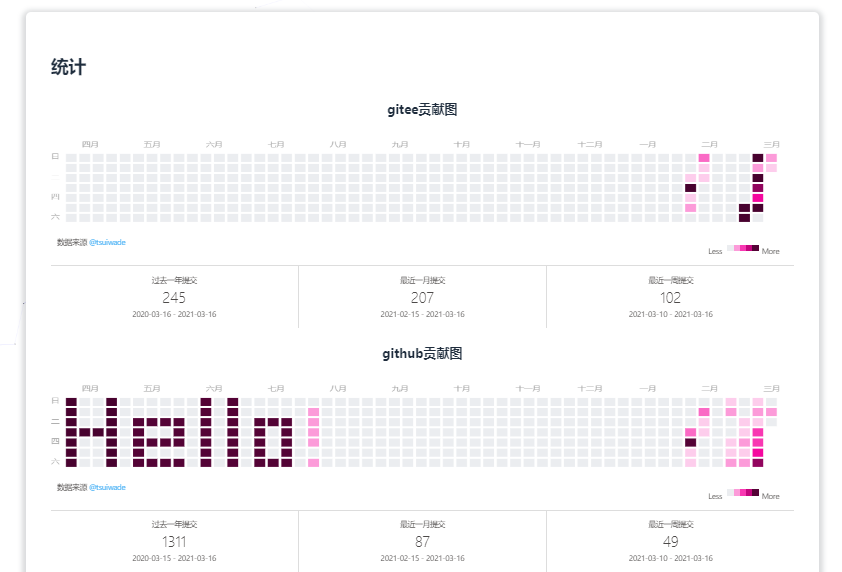
统计页的github贡献图只需要在统计页加上该标签,id已由上面方法描述好了。
<div align="center"><h2>github贡献图</h2></div> |
而gitee贡献图,再重复一遍上述操作,不过使用传统的主题修改模板的div+js挂载方法。用到https://github.com/Zfour/hexo-github-calendar中的[githubcalendar.js](https://github.com/Zfour/hexo-github-calendar/blob/master/githubcalendar.js)文件。
下载后,修改用户名,将其引入到主题中。该文件改名为giteecalendar.js,全文替换github为gitee。也需要在inject中引用该js文件。
最后代码同样:
<div align="center"><h2>gitee贡献图</h2></div> |
原理
参考: https://segmentfault.com/a/1190000022736595
其实Github统计的commit时间取决于Git仓库中记录的commit时间,而往Git仓库中提交的时间是可以修改的。
由于对Git命令不是太熟,一开始想到了通过修改系统时间来改变commit的时间,发现是可行的。
后来查到了commit命令有个—date参数,可以实现提交时间的自定义,格式为:
git commit --date="月 日 时间 年 +0800" -m "提交" |
比如:
git commit --date="May 7 9:05:20 2016 +0800" -m "提交" |
这样就可以实现用过去的时间进行提交。不过关于Github统计时间需要注意下根据官方说法是根据UTC时间统计的,不过我实测发现貌似和Github服务器的所在地点的时区有关,我访问的服务器猜测在旧金山,与北京时间差了16小时,也就是说如果想要Github统计的时间是0点,那么你北京时间就要设置成16点才行。
自定义提交时间我们实现了,接下来的事情就好办啦,我们如果要实现在Github贡献板任意涂鸦,其实只需要知道哪一天我们需要commit多少次就好了,自定义提交时间用来决定我们想让哪些格子有颜色,而commit次数的多少决定了颜色的深浅,这样通过这两者的结合,我们就可以轻松地创造出属于自己的像素风格的涂鸦啦。
可能出现的bug
之前可能在自己的电脑上登陆过别人的号,所以本地的git账号不是自己的,因此commit上并不能计算成自己的贡献。
于是查看了本地git账号,果然不是自己的,修改成自己的账号即可。具体可看如何在vscode修改git 的账号和邮箱 。